Creating a STUDY
This part of the tutorial will demonstrate how to create an EEGLAB STUDY and perform simple plotting. An EEGLAB STUDY (or study) contains descriptions of and links to data contained in many epoched or continuous datasets, for example, a set of datasets from a group of subjects in one or more conditions of the same task or performing different tasks in the same or different sessions. We use a STUDY to manage and process data recorded from multiple subjects, sessions, and/or conditions of an experimental study.
In addition to the tutorial sections below, you may want to watch the short video below on multiple subjects processing in EEGLAB (hosted on Youtube):
Table of contents
Getting ready for group-level analysis
Description of the 5-subject experiment tutorial data
In this tutorial, we will use a 5-subject STUDY (450Mb). These data were acquired by Peter Ullsberger and colleagues from five subjects performing an auditory task in which they were asked to distinguish between synonymous and non-synonymous word pairs (the second word presented 1 second after the first).
Data epochs were extracted from 2 sec before the second-word onset to 2 sec after the second-word onset.
After decomposing each subject’s data by ICA, two EEG datasets were extracted, one (Synonyms) comprising trials in which the second word was synonymous with the first one, and one (Non-synonyms) in which the second-word was not a synonym of the first.
Thus the study includes 10 datasets, two condition datasets for each of five subjects. Since both datasets of each subject were recorded in a single session, the decompositions and resulting independent component maps are the same across both conditions for each subject.
After downloading the sample STUDY data, unzip it in a folder of your choice (preferably in the ‘sample_data’ sub-folder of the EEGLAB release you are currently using). This will create a sub-folder STUDY5subjects. Then open a MATLAB session and run >> eeglab.
In other EEGLAB STUDY tutorials, we will also use the STERN task data (0.9Gb) and the animal/non-animal categorization task data (0.4Gb).
Data organization
The term STUDY indicates that datasets should originate from a single experimental STUDY and have comparable structure and significance.
The tutorial data is already optimally organized. However, when creating a new STUDY, it is preferable to organize your data before running the STUDY functions.
We suggest creating one directory or folder per subject, then storing the EEG dataset (“.set”) files for that subject in this folder. Even better, use the BIDS EEGLAB plugin to organize your data and make it BIDS compliant. The STUDY functions will then automatically add measure files to the same subject directories.
EEGLAB memory settings
We also advise modifying the default EEGLAB memory options. Call menu item File → Preferences. The first option determines if more than one dataset may be stored in memory. We will be selecting this option when performing group analysis, as it is often not possible to hold all datasets in memory.

When in use, STUDY datasets are partially or totally loaded into EEGLAB. They thus may also be accessed and modified individually, when desired, through the main EEGLAB graphic interface or using EEGLAB functions within custom dataset processing scripts. Dataset data arrays are then read from disk whenever EEGLAB requires access to the data, but without cluttering memory. This will allow MATLAB to load and hold a large number of dataset structures (2,300 is the all-time record), forming a large STUDY.
Quick STUDY creation
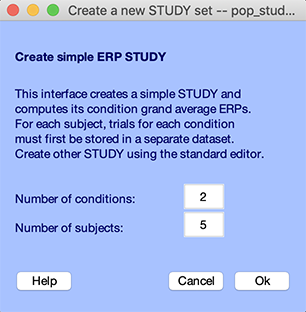
After uncompressing the 5-subject tutorial data, select the File → Create study → Simple ERP STUDY menu item to create a STUDY. The interface below pops up. Enter two for the number of conditions and five for the number of subjects, then press Ok.
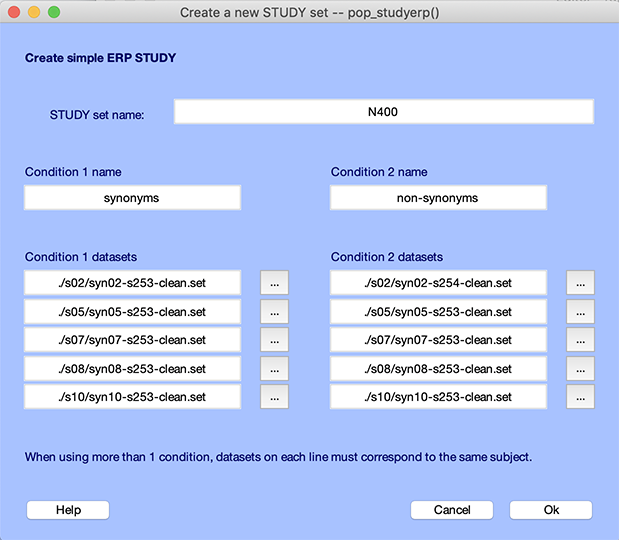
Then enter the following information in the interface below. There are two columns of data files, one for the condition synonym (files synXX-s253-clean.set) and one for the condition *non-synonym (files synXX-s254-clean.set) with one row per subject. You may use the browse (“…”) button to select the files. Name the STUDY “N400” and press Ok.
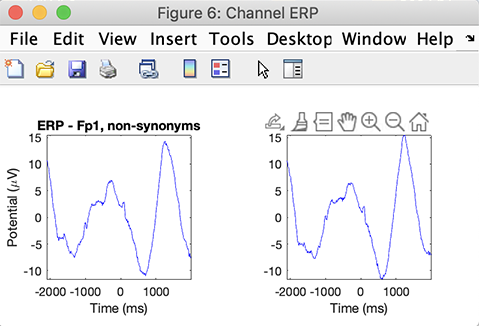
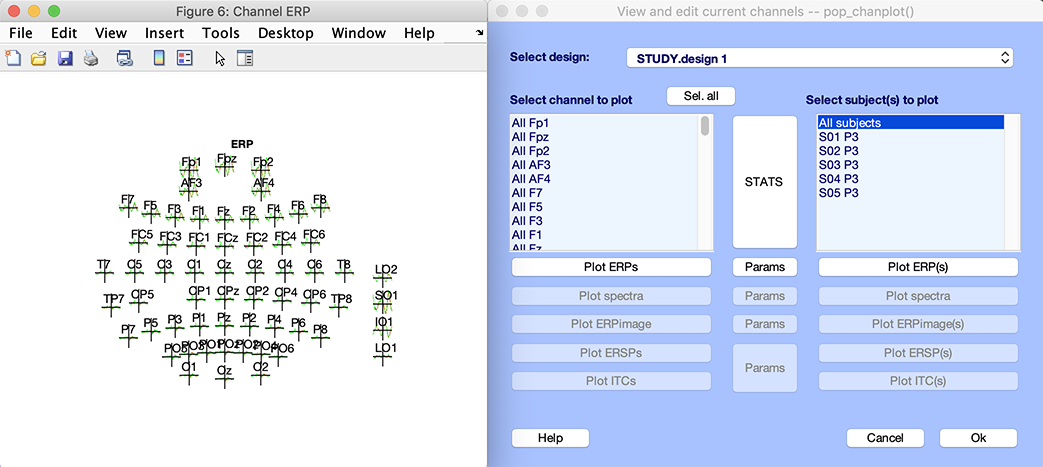
The following interfaces pop up. One is the grand average ERP across conditions for all electrodes. You may click on a trace to pop up a new figure. The other interface is the STUDY plotting graphic GUI. This interface is described in detail in the STUDY visualization tutorial.
This is how simple it is to create a STUDY. In the rest of this tutorial page, we will describe an alternative method for STUDY creation. This other method is more involved but allows setting additional parameters.
Creating a new STUDY
To create a STUDY, select the File → Create study → Browse for datasets menu item.
Another option is to load into EEGLAB all the datasets you want to include in the study and select the File → Create study → Using all loaded datasets menu item. A blank interface similar to the one described below will appear. In this window, enter a name for the STUDY (‘N400’), and a short description of the study (‘Auditory task: Synonyms Vs. Non-synonyms, N400’).
Here, we do not add notes about the study, but we recommend that you do so for your own studies. The accumulated notes will always be loaded with the study, easing later analyses, and re-analyses. Note that here the fields Subject and Condition (above) have been filled automatically. This is because the datasets already contained this information. For instance, if you were to load this dataset into EEGLAB by selecting the Edit → Dataset info menu item, you would be able to edit the subject, condition, group, session, and run for this dataset. You may also edit this information within the study itself. The dataset information and study dataset information may be different to ensure maximum flexibility, although we recommend checking the checkbox Update dataset info… to keep them consistent.
Click on the Browse button in the first blank location and select a dataset name. Do so for other datasets as well.
The interface window should then look like the following:
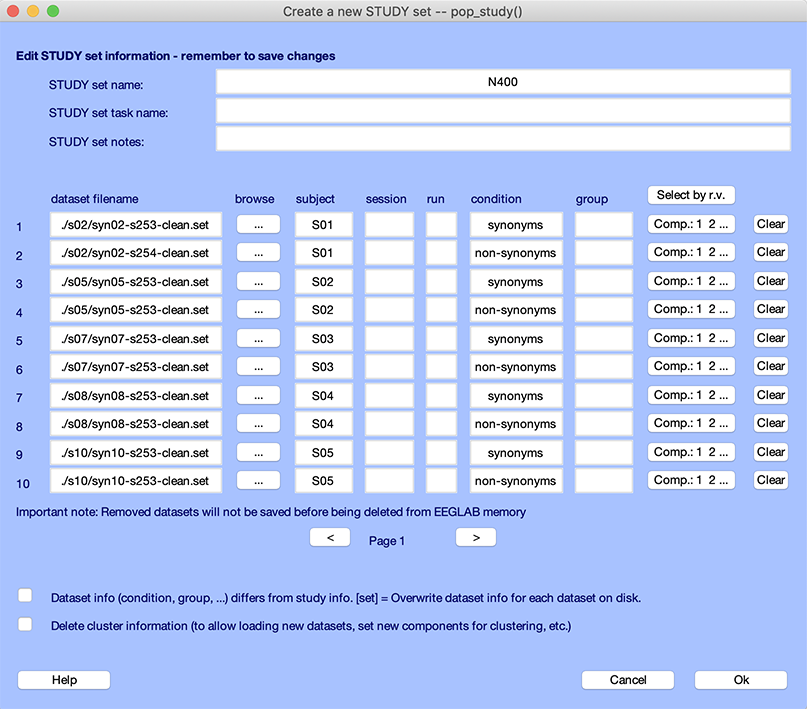
Below, we detail what the STUDY terms subject, session, run, condition, and group mean.
- The top of the window contains information about the STUDY, namely its running name, the extended task name for the STUDY, and some notes.
- The next section contains information about the 10 datasets that are part of the STUDY. For each dataset, we have specified a subject code and condition name.
- For each file, you may assign a session and run number. A run is when there are blocks in an experiment, and the data from each block is stored in a separate file. Sessions are used when the data is collected on different days or when there is a break that involves removing the EEG cap. We chose to leave the session and run empty since there are irrelevant for this STUDY (there is only one session and one run per subject).
- The condition column contains the condition associated with each file. Note that we have two files here per subject. However, it is also possible to have a single file per subject and to define conditions using EEGLAB event trial types. For more information on this topic, read the STUDY design tutorial.
- The group column indicates the group a subject belongs to. This is irrelevant for this STUDY since there was only one subject group.
- We will come back later to the Select by r.v. (select ICA component by residual variance) and the Comp… button when we perform ICA component clustering.
- Pressing the Clear button clears the information on a given row.
In general, we prefer the dataset information to be consistent with the STUDY information – thus, we may check the first checkbox. The second checkbox removes all current cluster information and will be explained when we perform ICA component clustering.
After you have finished adding datasets to the study, press Ok in the pop_study.m GUI to import all the datasets.
We strongly recommend that you also save the STUDY by selecting the EEGLAB menu item File → Save study as after closing the pop_study.m window.
Loading an existing STUDY
Either use the studyset created in the previous section or load another studyset. To load a studyset, select the File → Load existing study menu item. Select the file N400.study in the folder STUDY5subjects. After loading or creating a study, the main EEGLAB interface should look like this:
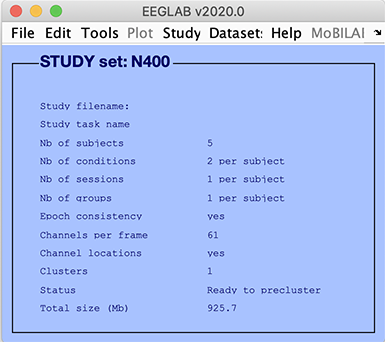
In the EEGLAB GUI (above):
- Epoch consistency indicates whether or not the data epochs in all the datasets have the same lengths and limits.
- Channels per frame indicates the number of channels in each of the datasets (It is possible to process datasets with different numbers of channels).
- Channel location indicates whether or not channel locations are present for all datasets.
- Clusters indicates the number of component clusters associated with this STUDY. There is always at least one cluster associated with a STUDY. This contains all the pre-selected ICA components from all datasets.
- Status indicates the current status of the STUDY. In the case above, this line indicates that the STUDY is ready for pre-clustering.
To list the datasets in the STUDY, use the Study → Edit study info menu item. The interface described in the previous section will pop up.
Editing STUDY datasets
Selecting an individual dataset from the Datasets menu item allows editing individual datasets in a STUDY.
Note, however, that creating new datasets or removing datasets will also remove the STUDY from memory since the study must remain consistent with datasets loaded in memory (EEGLAB will prompt you to save the STUDY before it is deleted).
Reviewing the STUDY design
Another section of the tutorial describes STUDY designs in detail, but it uses a different tutorial dataset. Our design is simple here, with only two conditions.
To edit the STUDY design, select the second STUDY menu item Study → Select/Edit study design(s).
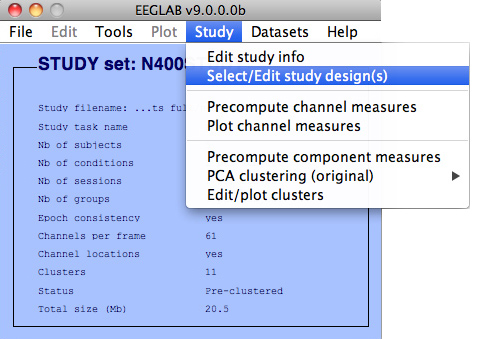
This will pop up the following interface.
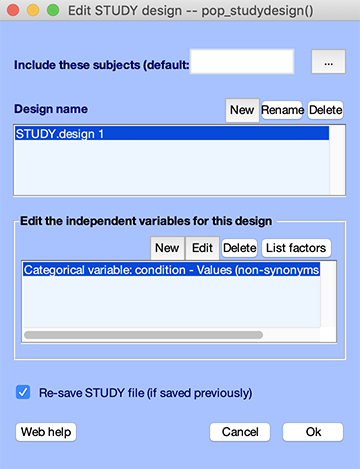
The top panel contains the list of designs (in this case, a single design), and the bottom panel contains the variables used in a specific design.
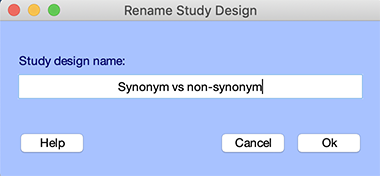
Let’s rename the default design by pressing the Rename button to Synonym vs non-synonym. The following GUI pops up. Press Ok.
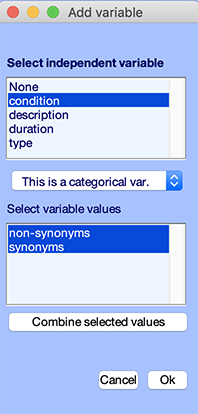
Now, in the bottom panel, click on the Edit button. The following GUI pops up. We can see that the condition independent variable is selected. We can also see that the two conditions are non-synonyms and synonyms.
What to do after creating your STUDY
We have already seen in this tutorial how to create a simple STUDY and plot the grand average ERP using the File → Create study → Simple ERP STUDY menu item. This procedure bypass the standard STUDY pipeline, which consists of creating the STUDY, preprocessing the data, and plotting it, as we describe in the group analysis visualization tutorial.
If you are impatient, select the Study → Precompute channel measures menu item, click the ERPs checkbox, and press Ok. Then select the Study → Plot channel measures menu item and press the Plot ERPs pushbutton to plot the ERP for the first channel in the list. The following plot showing the grand-average ERP for each condition will pop up.
